Note: This guide works perfectly with the latest version of Pi-Hole 5.3.1 and DSM 7
- STEP 1
Please Support My work by Making a Donation.
- STEP 2
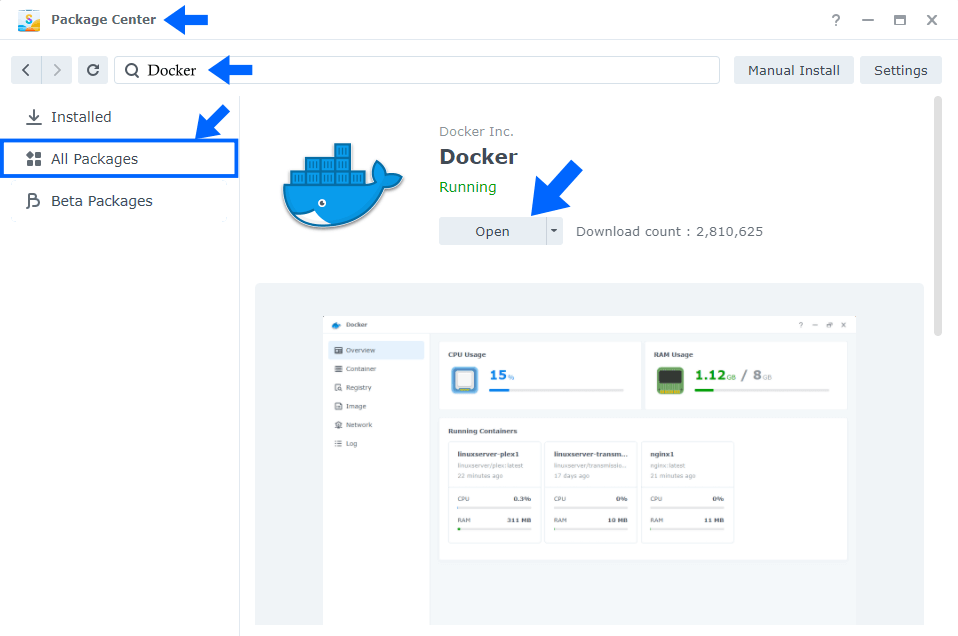
Install Docker via Synology “Package Center”.
- STEP 3
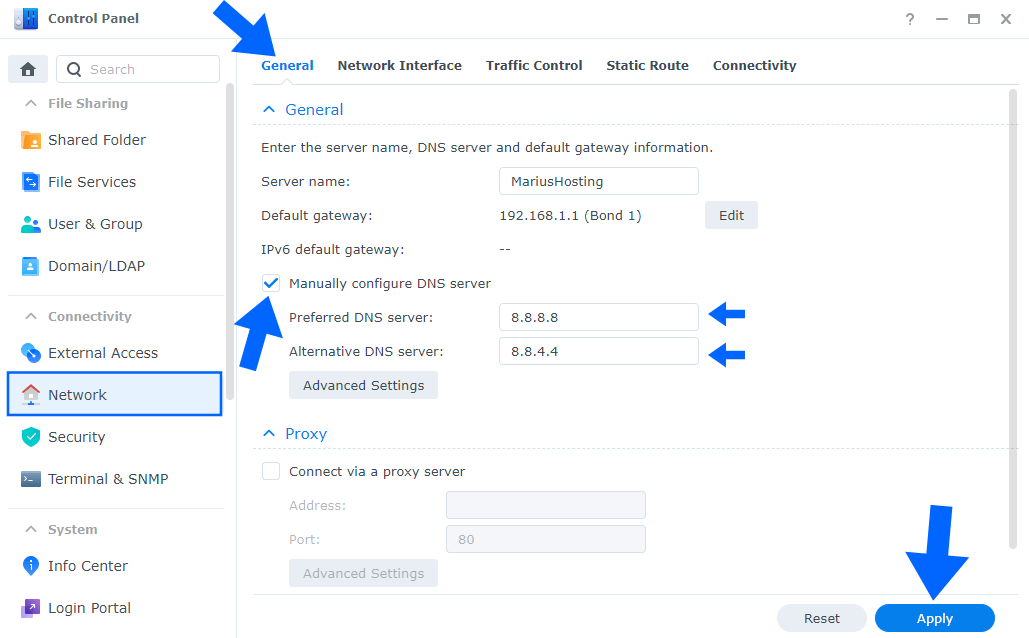
Add Google DNS. Go to Control Panel / Network / General. Check “Manually configure DNS server” and add on Preferred DNS Server: 8.8.8.8 and on Alternative DNS Server: 8.8.4.4 Click Apply. Follow the instructions in the image below.
- STEP 4
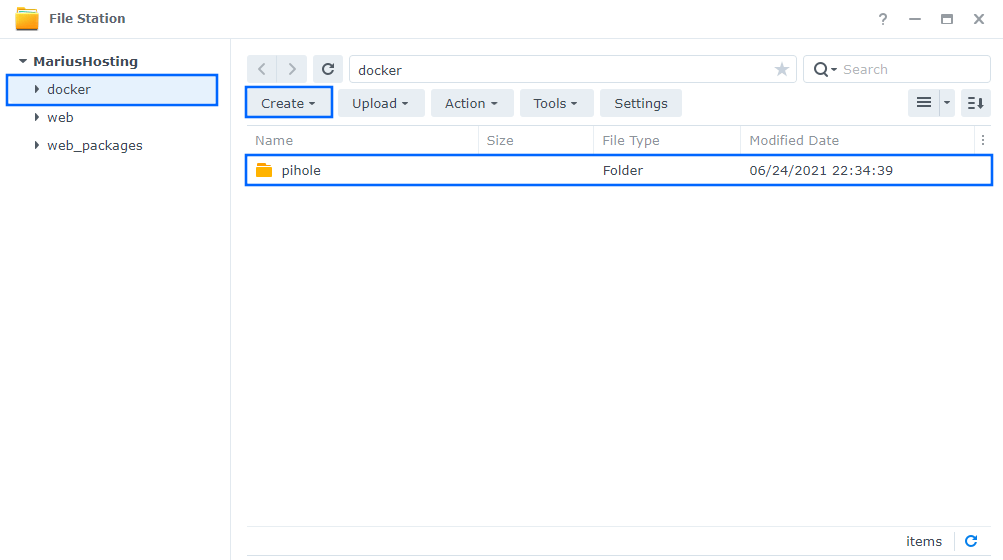
Go to File Station and open the docker folder. Inside the docker folder, create one new folder and name it pihole. Follow the instructions in the image below.
Note: Be careful to enter only lowercase, not uppercase letters.
- STEP 5
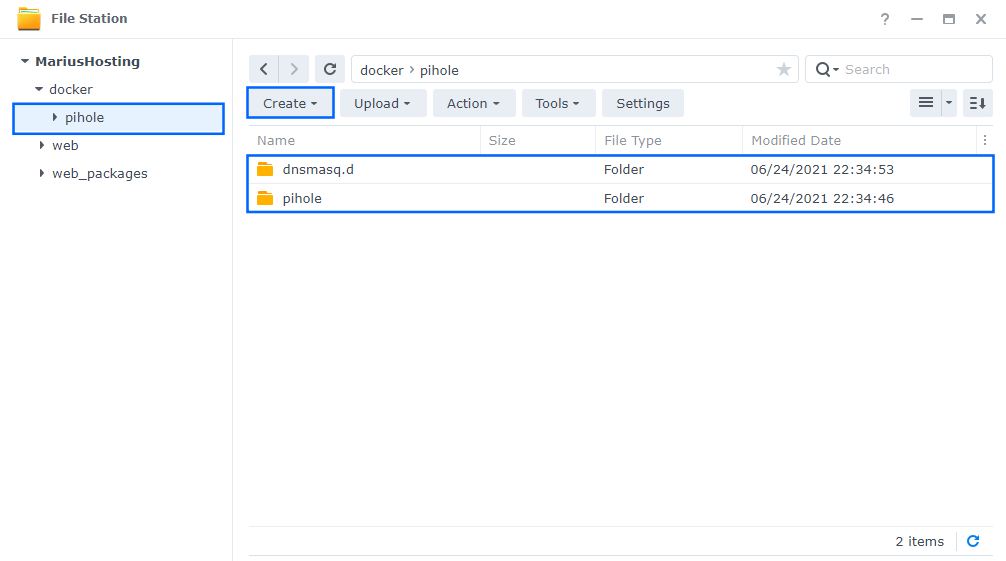
Now create two new folders inside the pihole folder that you created at STEP 4 name one “pihole” and the other “dnsmasq.d“. Follow the instructions in the image below.
Note: Be careful enter only lowercase, not uppercase letters.
- STEP 6
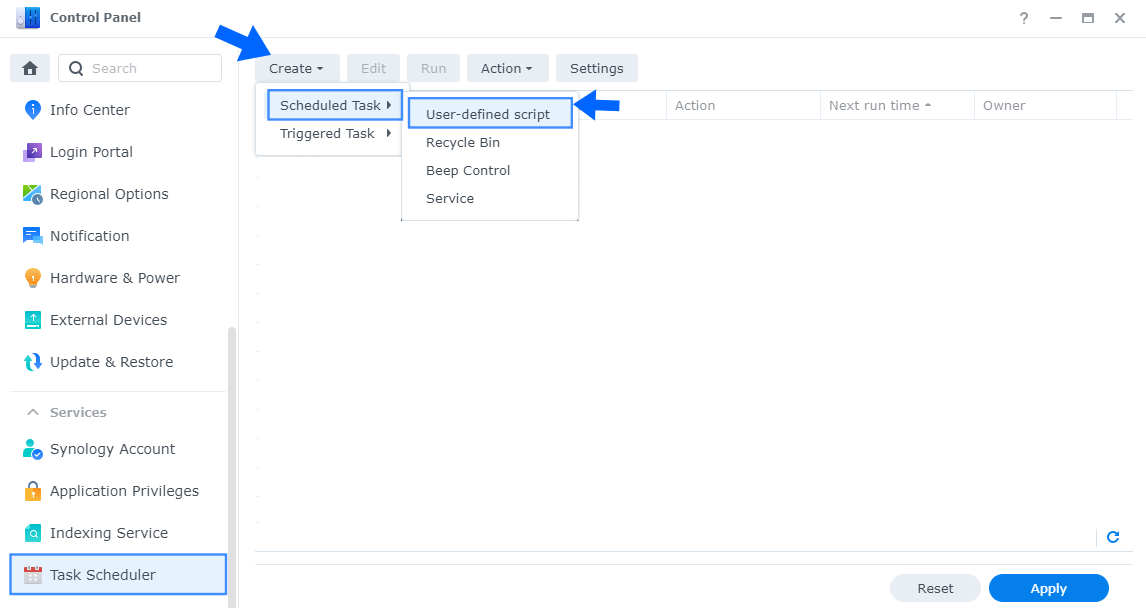
Go to Control Panel / Task Scheduler / Create / Scheduled Task / User-defined script. Follow the instructions in the image below.
- STEP 7
Once you click on User-defined script a new window will open. Follow the instructions below:
- General: In the Task field type in “Install Pi-hole“. Uncheck “Enabled” option. Select root User.
- Schedule: Select Run on the following date then select “Do not repeat“.
- Task Settings: Check “Send run details by email“, add your email then copy paste the code below in the Run command area. After that click OK.
docker run -d --name=pihole \
-e WEB_PORT=8080 \
-e WEBPASSWORD=yourpassword \
-e ServerIP=192.168.1.135 \
-e DNSMASQ_LISTENING=local \
-v /volume1/docker/pihole/dnsmasq.d:/etc/dnsmasq.d \
-v /volume1/docker/pihole/pihole:/etc/pihole \
--net=host \
--restart always \
pihole/piholeNote: Before you paste the code above in the Run command area, change the value for WEBPASSWORD and add your own password.
Note: Before you paste the code above in the Run command area, change the value for ServerIP and add your own Synology NAS Local LAN IP.

- STEP 8
After you click OK on STEP 7 a new warning pop up window will open. Click OK.

- STEP 9
After you click OK on STEP 8, select your “Install Pi-hole” Task then click the “Run” tab. You will be asked to run Install Pi-hole – click Yes. Follow the instructions in the image below.

- STEP 10
Go back to STEP 1 or you will deal with karma 🙂
- STEP 11
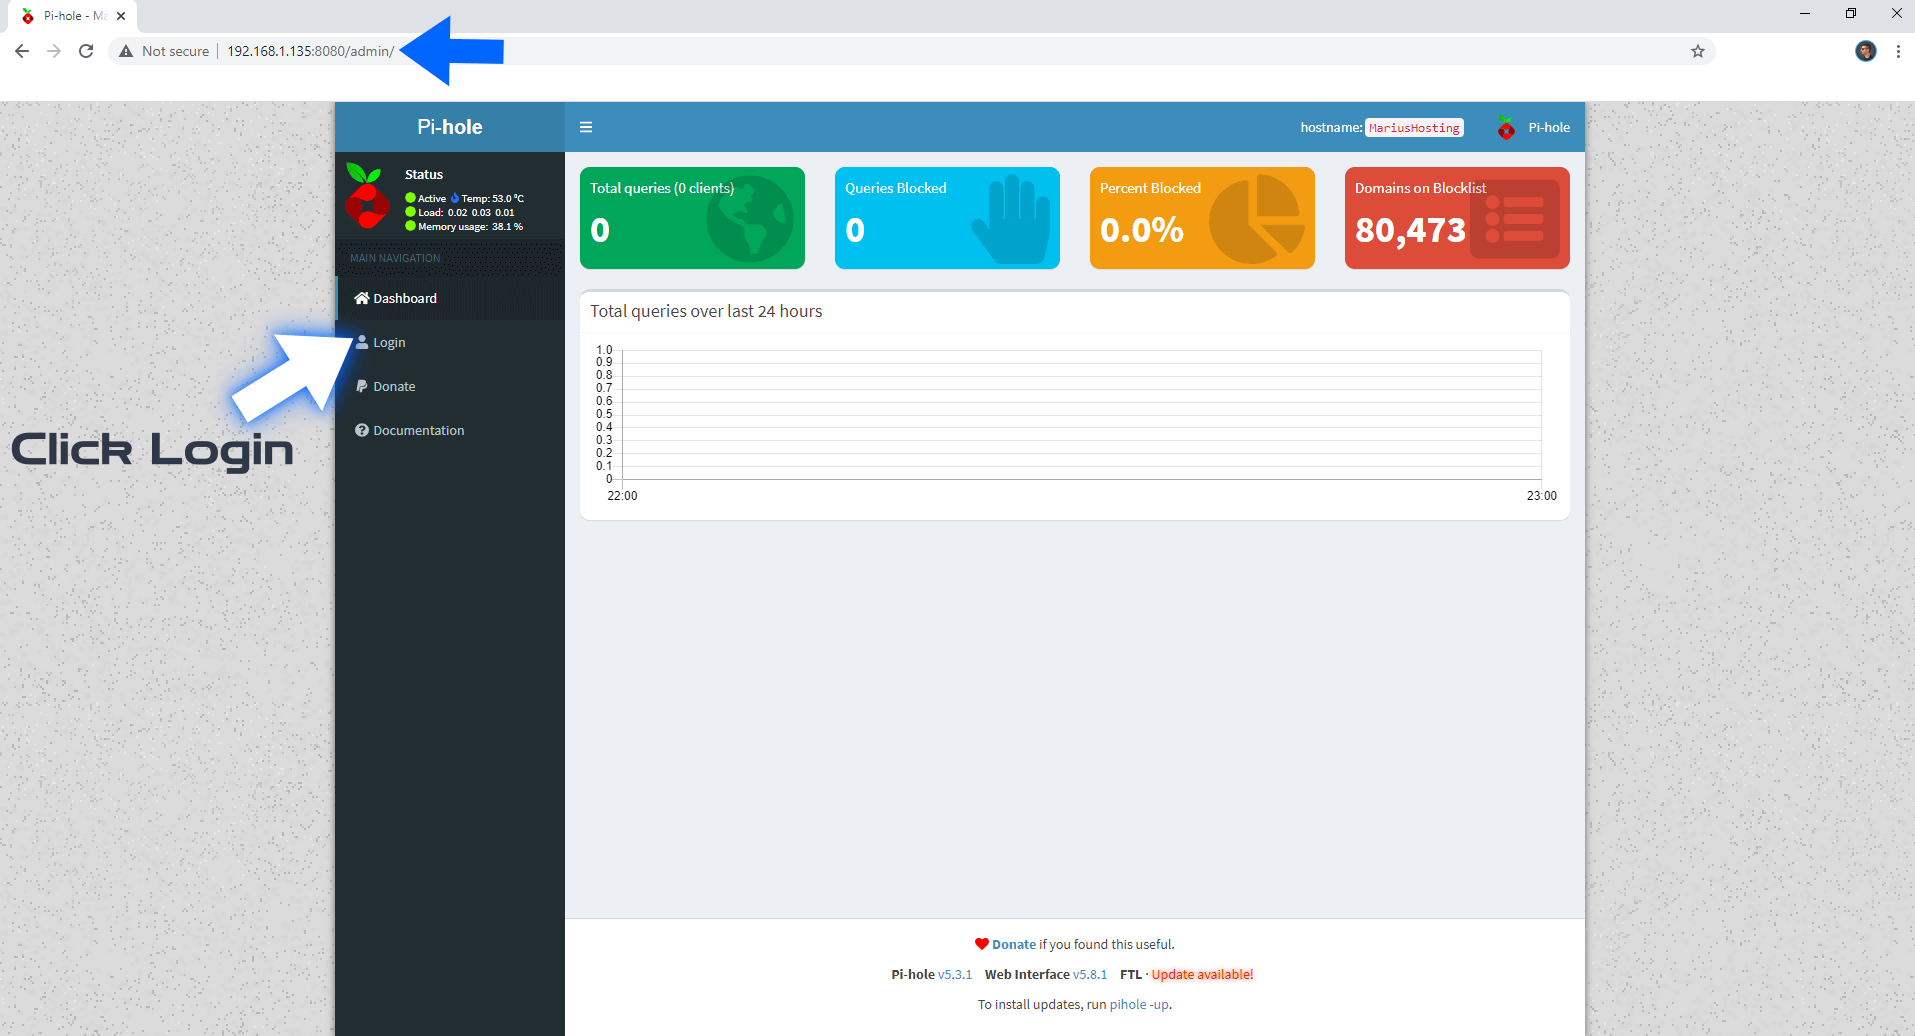
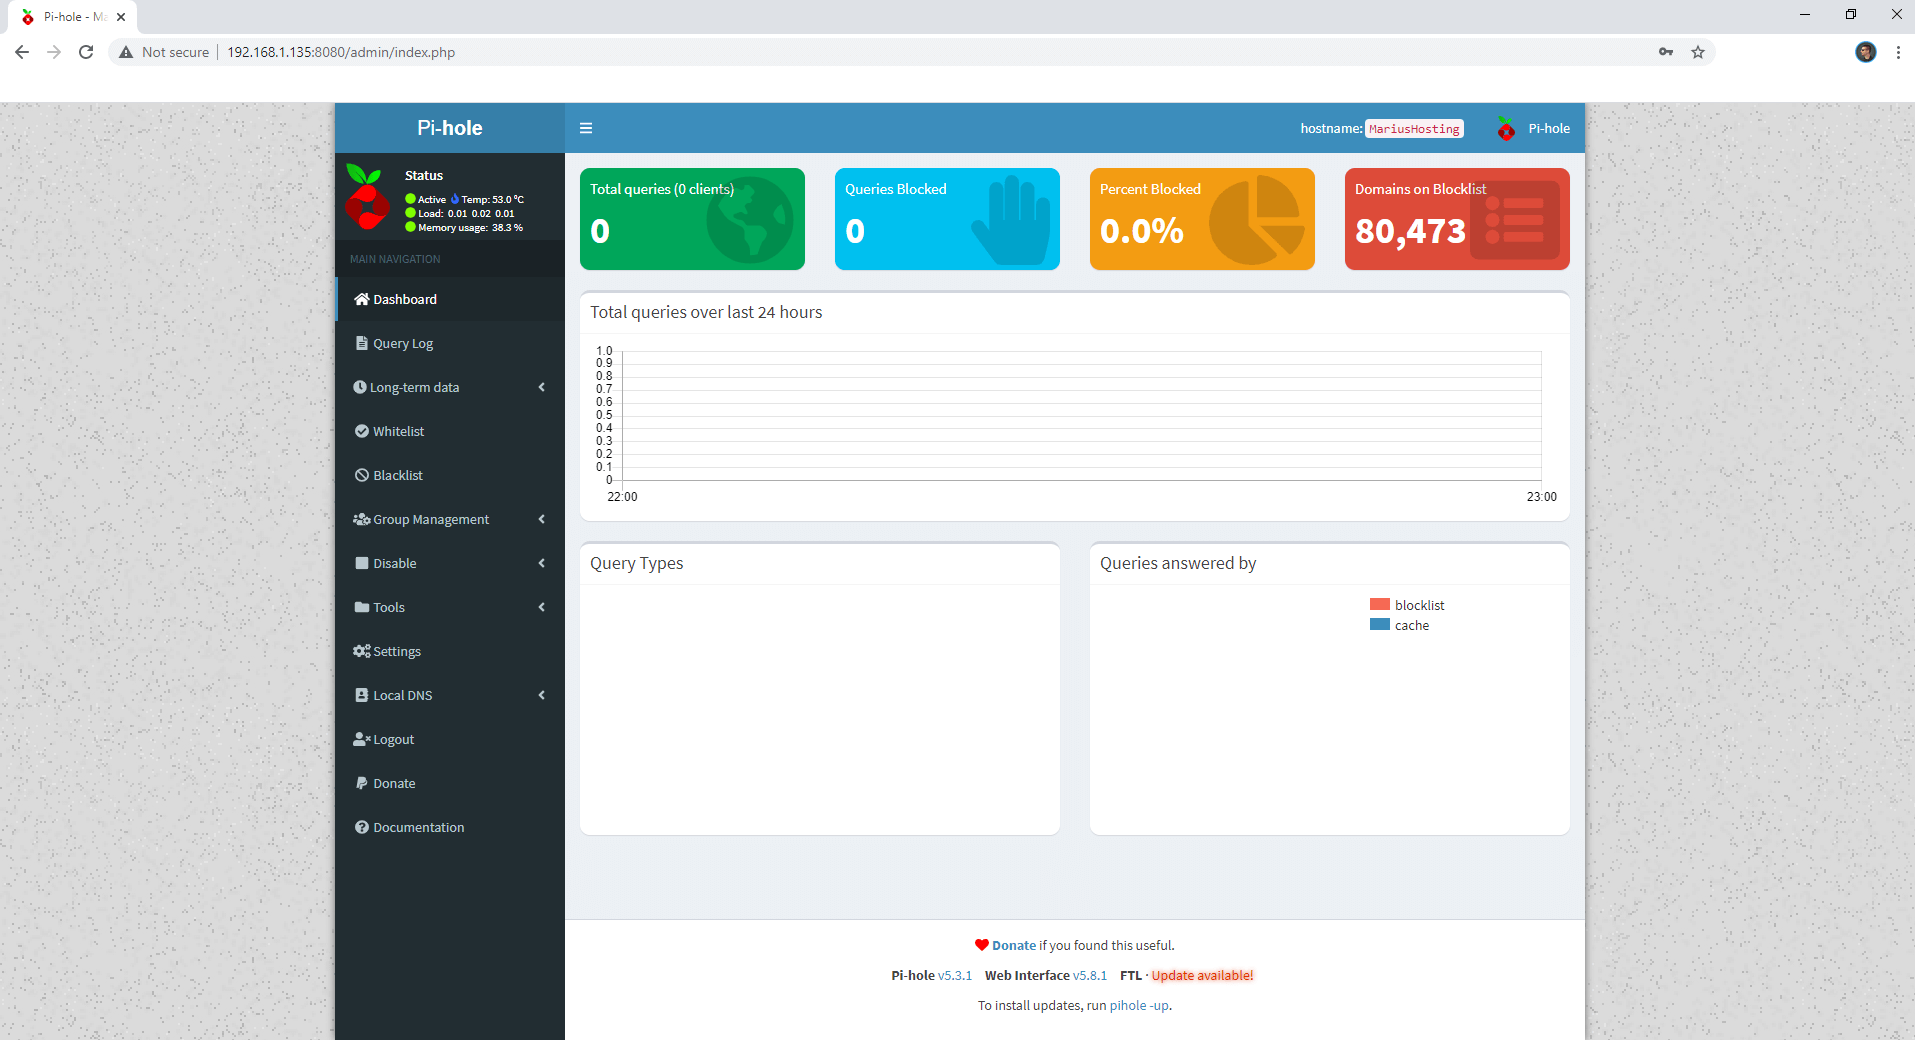
The installation process can take up to a few seconds/minutes. It will depend on your Internet speed connection. Now open your browser and type in http://Synology-ip-address:8080/admin/ on the left sidebar click Login. Follow the instructions in the image below.
- STEP 12
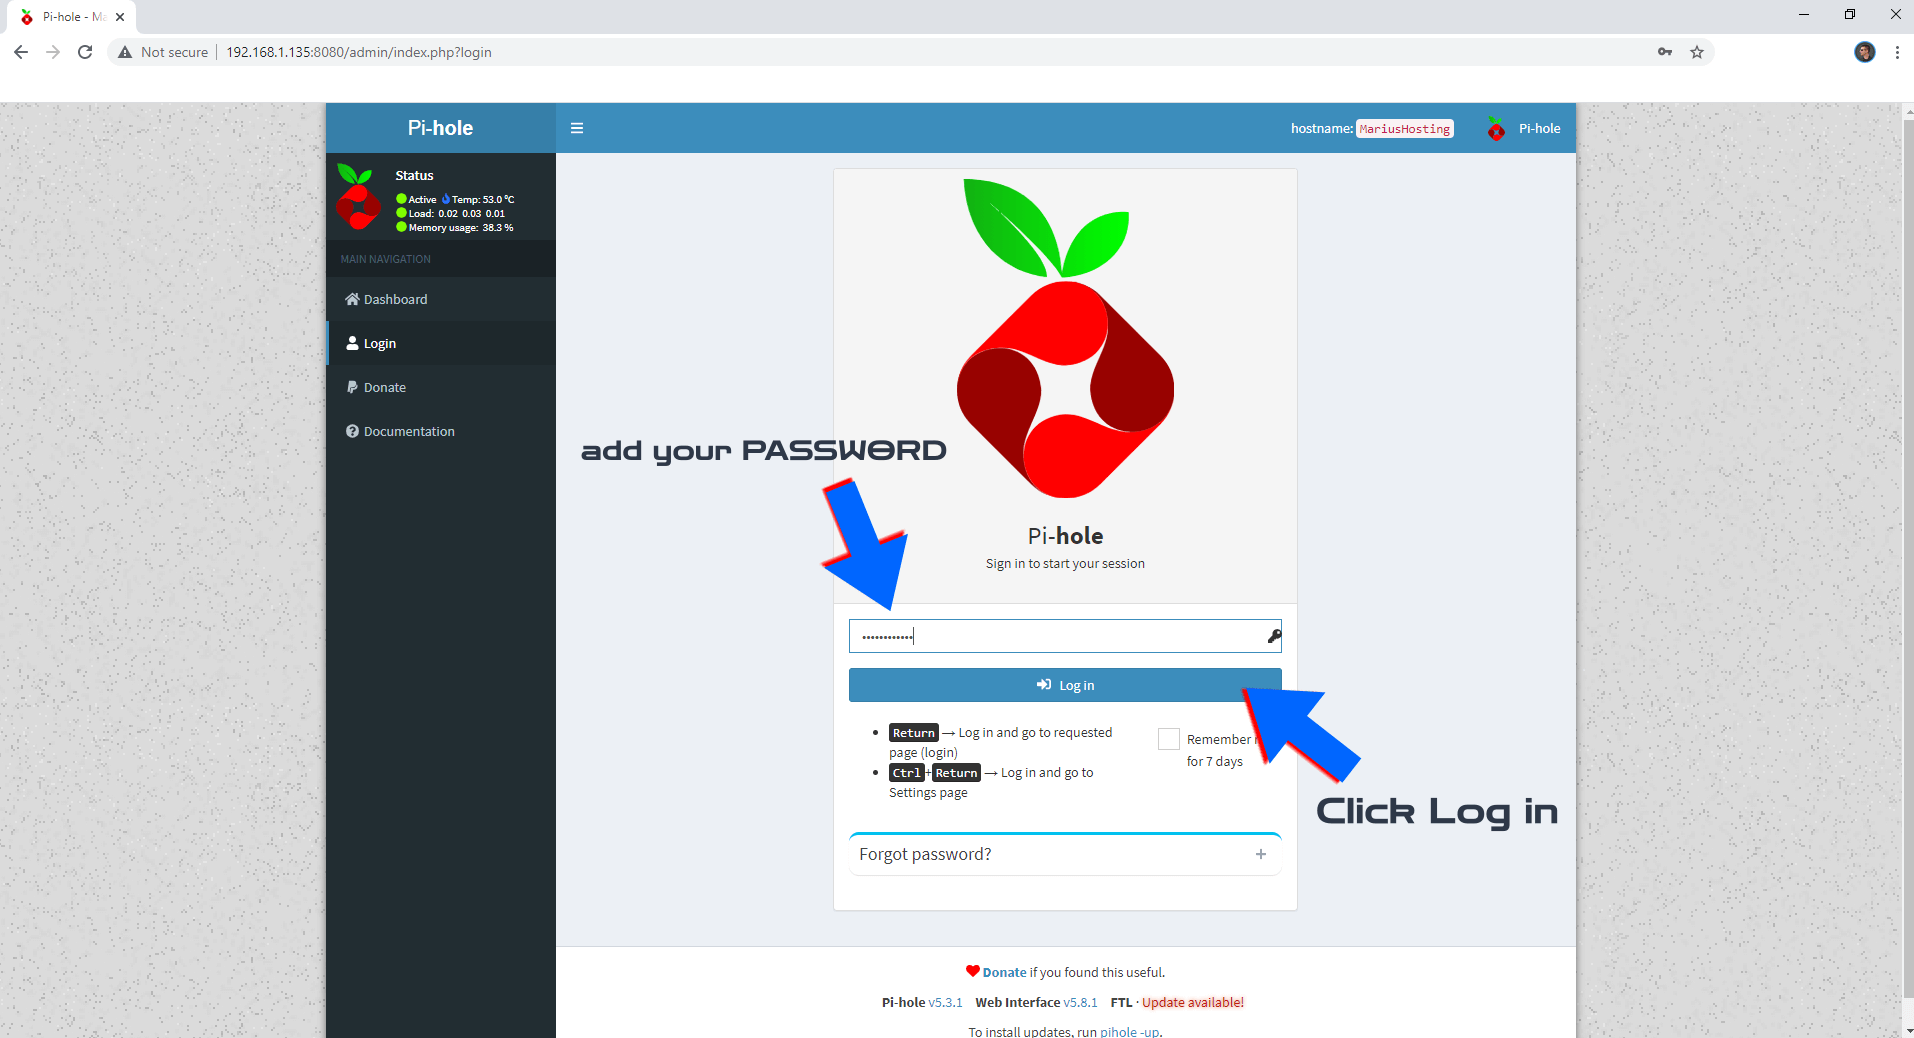
Type in the password you have previously created at STEP 7. Click Log in. Follow the instructions in the image below.
Enjoy your Pi-hole! Set it up according to your preference.
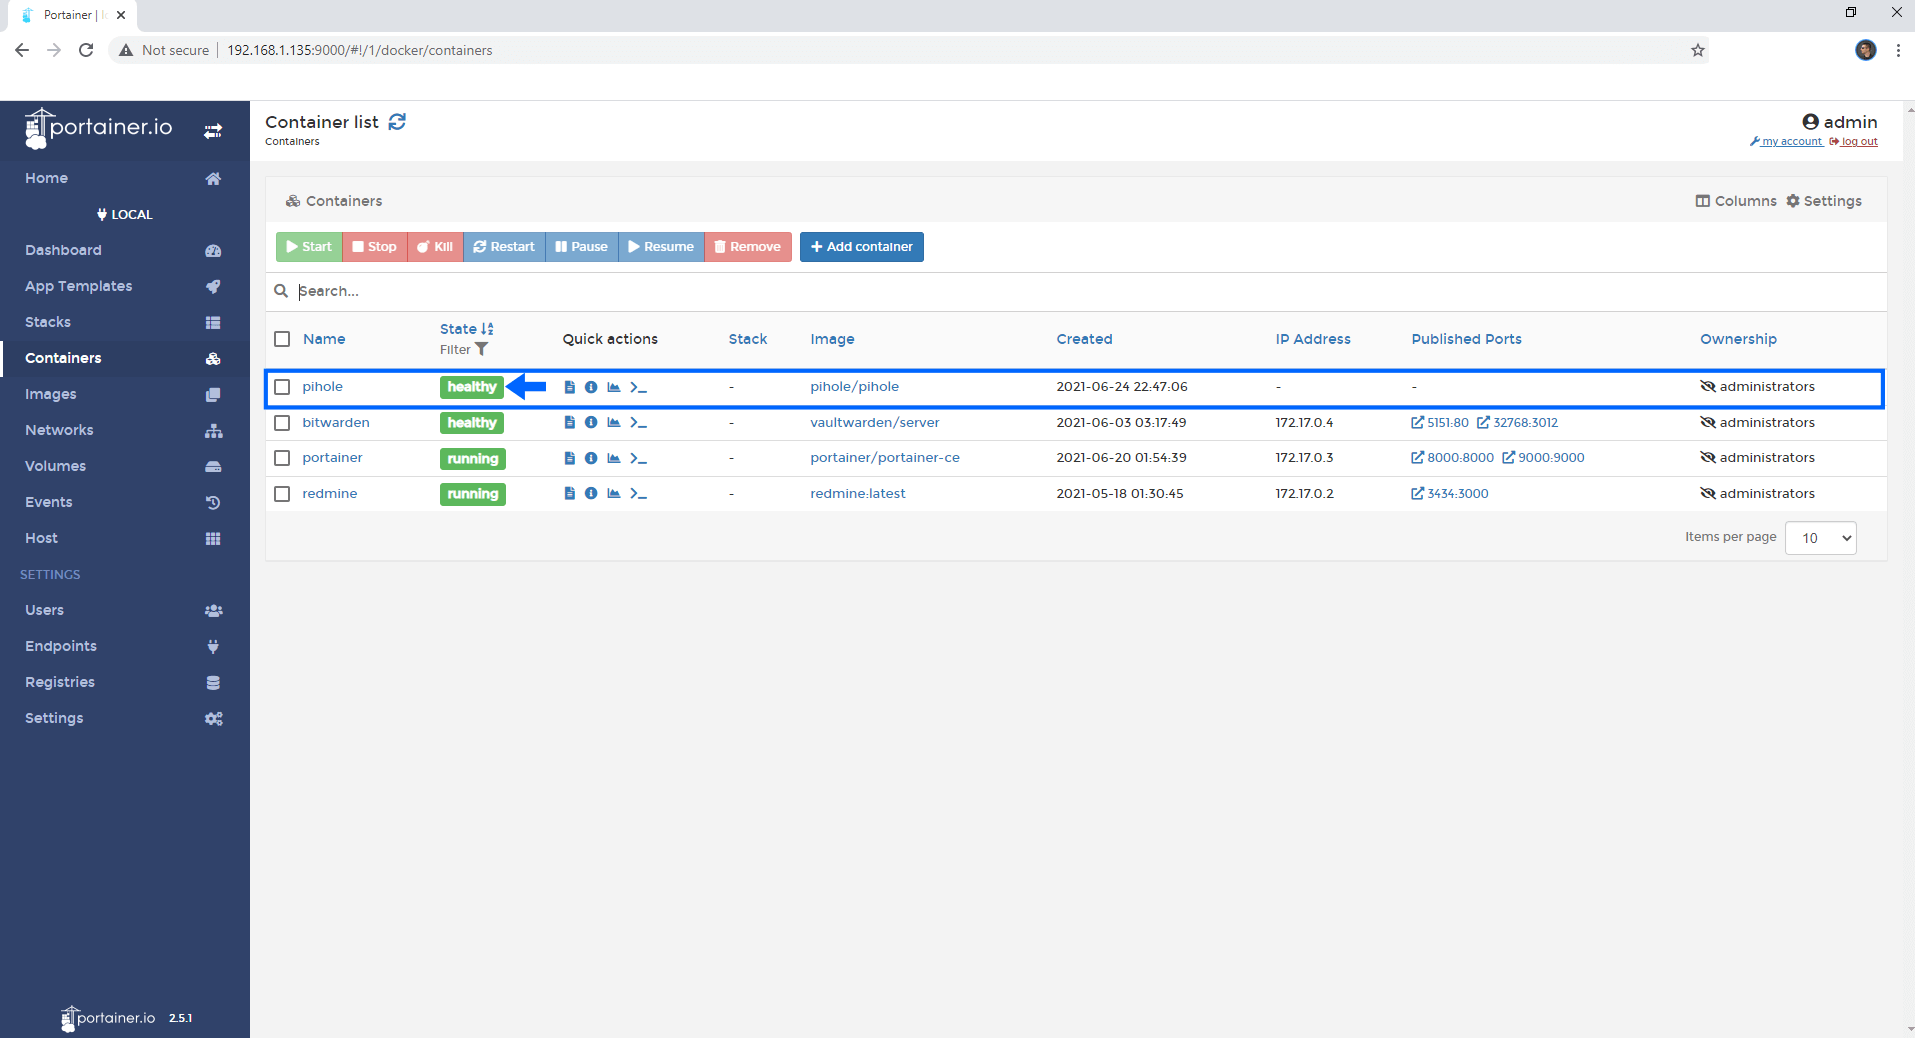
If you have Portainer installed on your Synology NAS you can also see the Pi-hole container perfectly running with the healthy status.
That’s it! I hope this little guide helps you install Pi-hole on your Synology NAS.
Note: Many content providers (like YouTube / Reddit / Twitch / Spotify / Pandora / Facebook / Hulu) now stream/serve ads from the same servers as the content (meaning if you attempt to block the ads using a Pi-Hole you will also block the content).
Note: If you experience connections problems remember to set your Synology Firewall in Control Panel / Security / Firewall / Edit Rules/ Create Firewall Rules and allow Custom Port 53 Protocol All.
Note: Mandatory is to upgrade your Synology NAS RAM memory. Why do you need more RAM? To be more responsive! You will not use Synology NAS just for Docker. Pi-hole needs a minimum of 512 MB of RAM (I repeat, a minimum and that’s just for Pi-hole). If anyone wants to stay within the strict minimum RAM, they are welcome to, but their system will never be as responsive as those which have more RAM installed.
Note: How to Free Disk Space on Your NAS if You Run Docker.
Note: Some people may have problems launching Pi-Hole via Docker. This may be because of different settings in your Synology NAS and router. Every user has their own router settings etc. It’s really hard to troubleshoot the problem. You can also contact me via email and I will try to find a personalized solution for you.
Note: After installing Pi-hole (through Docker), Synology NAS drives are not hibernating at all. The best solution is to Disable Hibernation. This will be easier and much more beneficial overall for everything Pi-hole needs to read database of filters.
Note: Find out how to update Pi-Hole container with the latest image.
Note: If someone have a problem once installation is completed, and get an error “This site can’t be reached” open the Pi-hole GUI and go to Settings / DNS tab and in “Interface listening behavior” option change to Listen on all interfaces, instead of Listen only on interface eth0. (Reported by jtd).
Note: If your Pi-hole container keeps disconnecting uninstall the Synology Package named “DNS Server” which will conflict with Pi-hole on port 53 and don’t let your Pi-hole start.
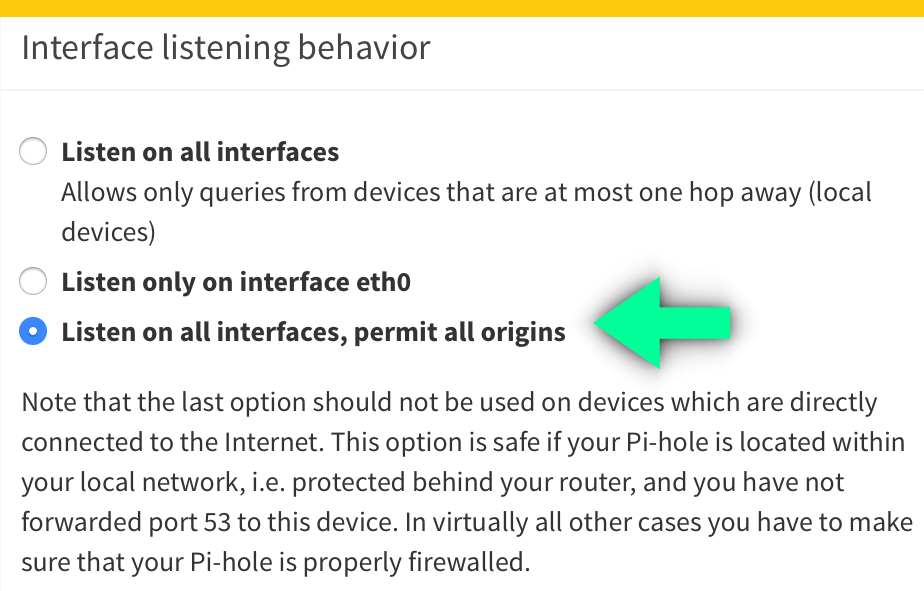
Note: How can I make Pi-Hole work over VPN connection? Go to Pi-Hole Preferences then check “Listen on all interfaces, permit all origins” on “Interface listening behavior”. Follow the instructions in the image below:
Note:Can I run Docker on my Synology NAS? See the supported models.
Note: At STEP 7 you can also change the value variable for the: WEB_PORT – 8080 or 1010 or whatever you want.