Step 1: Prepare the SD card with Raspbian

- Download the Raspbian image.
- Extract the image (.img) file from the downloaded archive.
- Burn the Raspbian image file via Etcher.
Step 2: Install Raspbian and set Hostname
- Insert the SD card in the Raspberry Pi memory card slot and power the device to boot.
- Wait for the boot process to complete and login with the default user “pi” and password “raspberry”.
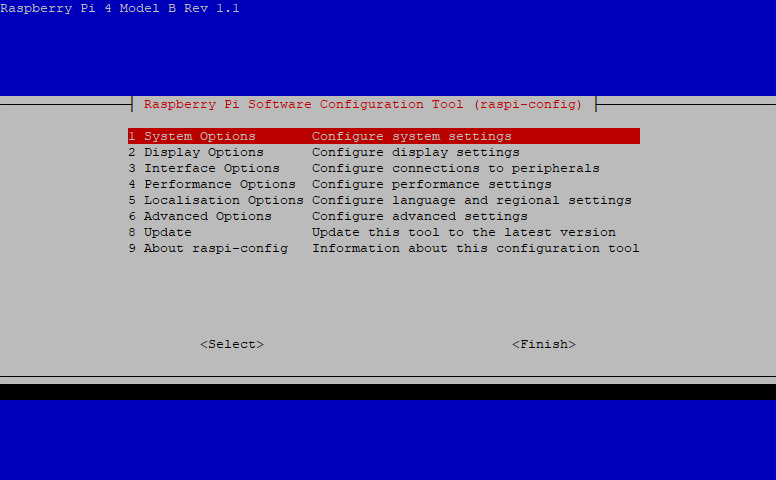
- Run the Raspbian configuration utility with the command: sudo raspi-config
- Select “1. System Options” and press the <Enter> key.
- Select “S4 Hostname”, press the <Enter> key and then “OK” on the warning dialog.
- Enter the Pi’s hostname using only alphanumeric characters and dashes (“-”).
- Select <Finish> and then <Yes> to reboot and apply the hostname configuration.
Step 3: Set a Static IP
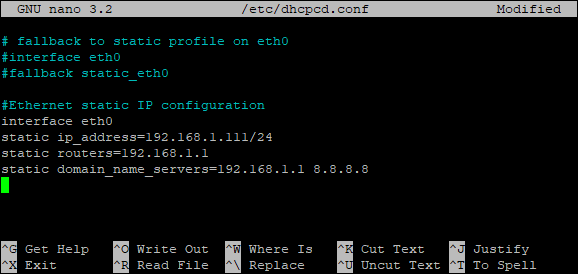
- Edit the “/etc/dhcpcd.conf” file to configure the ethernet interface “eth0” with the nano editor: sudo nano /etc/dhcpcd.conf
- Scroll to the end of the file and add the following lines, making sure to replace the values for “interface”, “ip_address”, “routers” (gateway) and “domain_name_servers” based on your LAN settings:
#Ethernet static IP configuration
interface eth0
static ip_address=192.168.1.111/24
static routers=192.168.1.1
static domain_name_servers=192.168.1.1 8.8.8.8
Note: LAN installs are supported on properly configured RFC 1918 private networks, i.e. 172.16.0.0 /10.0.0.0/192.168.0.0 IP range.
- Press the “Ctrl” + “x” key combination, then “y” and <Enter> to confirm writing changes to the file.
- Reboot the Pi using:
sudo reboot
- When the Pi boots again, login with “pi” user and verify “eth0” IP address with the command:
ip a